But since I'm miles from there, I had to depend on my lovely friend Andrea in Boston to send me some cool Sally Hansen Salon Effects nail strips that I had been eyeing since Nylon reviewed it!
I have the colours CUT IT OUT, and SKINNY JEANS, decided to go with Cut It Out..
here's what the box comes with


1 mini file which is a file & buffer in one
16 nail strips so you can choose the size to fit your nails
1 mini cuticle stick
an instruction booklet
So here goes.. I haven't done a how-to post before, I hope this will be nice and strightforward!

Step 1: Remove all old nail polish and trim nails down to your preferred length. I always have short nails because of my work so you can hardly see any free edge on mine. Use the file to shape all edges.. my nails have a round edge
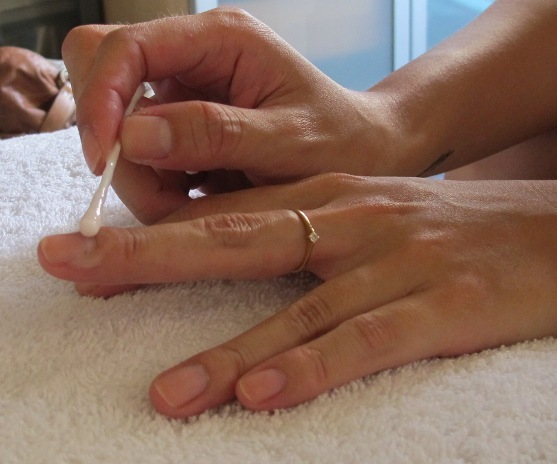

Step 2: Use the cuticle pusher to push back any cuticles(gently!). I was abit more obsessive so I used cuticle remover too. If you're using chemicals on your hands, wash them thoroughly after this step.
Step 3(not shown): Run the nail polish remover over your nails again to clean up any oils or debris from the filing

Seep 4: without removing the backing, compare strips to nail bed width and choose appropraite size which fits as closely as possible. If it is a little little little bit smaller it is OK because you're able to stretch it slightly on application

Step 5: Found the right size? peel both the top plastic protector as well as the bottom away. Be careful now.. it becomes very limp.
Align it with the base and side of your nail.
tip: You can stretch it slightly while applying it..be careful not to stretch it too much.. it is very thin and fragile, will tear easily. If it sticks you can still lift it up a little and restick it.
Try practicing with a couple that definitely do not fit your nails just to get a feel of it before doing it for real

Step 6: Bend the excess over the free edge of the nail but make sure what's supposed to be on the nail is completely stuck on. Don't leave air bubbles under it, especially while trying to bend it over the edge.

Step 7: Filing the edge off. Gently file it vertically at a few points, before horizontally filing it all off.
Important tip: While filing it off, always do it towards the center and in short, gentle strokes. If you do it in a long quick stroke, it may lift of what's on the nail and tear. Now you don't want that happening!!!

Complete!!!!!!!!!
What do I think of it? Super easy to use!! I honestly do not like spending alot of time on my nails. And if time is money, this one is so fast for such a cool design that I think it's well worth my money!
It costs between US$8.95 - 11
It smells a little like nail polish. I tried to remove the design off one nail and it came off relatively easily just like nail polish.
Tomorrow I will try adding a top coat for extra gloss and protection. From many reviews I've read online, the girls say it lasts over 6 days without chips (SH claims 10 days). We'll see how it goes :D
The only thing I don't like is the amount of waste there is. Each pack contains an instruction booklet, file/buffer, and cuticle stick, packed in a nice plastic box. If they could make some "refills" without the excessive packaging, that'll be really green.
Please Sally Hansen, bring this into Singapore too!!!
Sephora Singapore carries something similar by Sephora, but no cool patterns brought here :(
They have tons of designs!! I'm gonna be begging my friends to bring this back for me :D